Fitting a flexible ligand
Learn how to fit a flexible ligand into density.
Setting up example data
First, let's set up the example data (described in more detail here):
Get the files from the Phenix regression directory and change into the new folder:
phenix.setup_tutorial tutorial_name=model-building-scripting
cd model-building-scripting
Type phenix.python to start up Python with the Phenix environment all set up:
phenix.pythonSet up the high level objects, so we can start our task:
from iotbx.data_manager import DataManager    # Load in the DataManager
dm = DataManager()             # Initialize the DataManager and call it dm
dm.set_overwrite(True)         # Overwrite files with the same name
mmm = dm.get_map_model_manager(        # getting a map_model_manager
  model_file="boxed_ligand_map.pdb",   # model file
  map_files="boxed_ligand_map.ccp4")   # map file
mmm.set_resolution(3.0)    # working (nominal) resolution of map
mmm.set_experiment_type('xray')   # define experiment type
mmm_saved = mmm.deep_copy()   # save a copy of the map_model_manager
Fitting a ligand into density
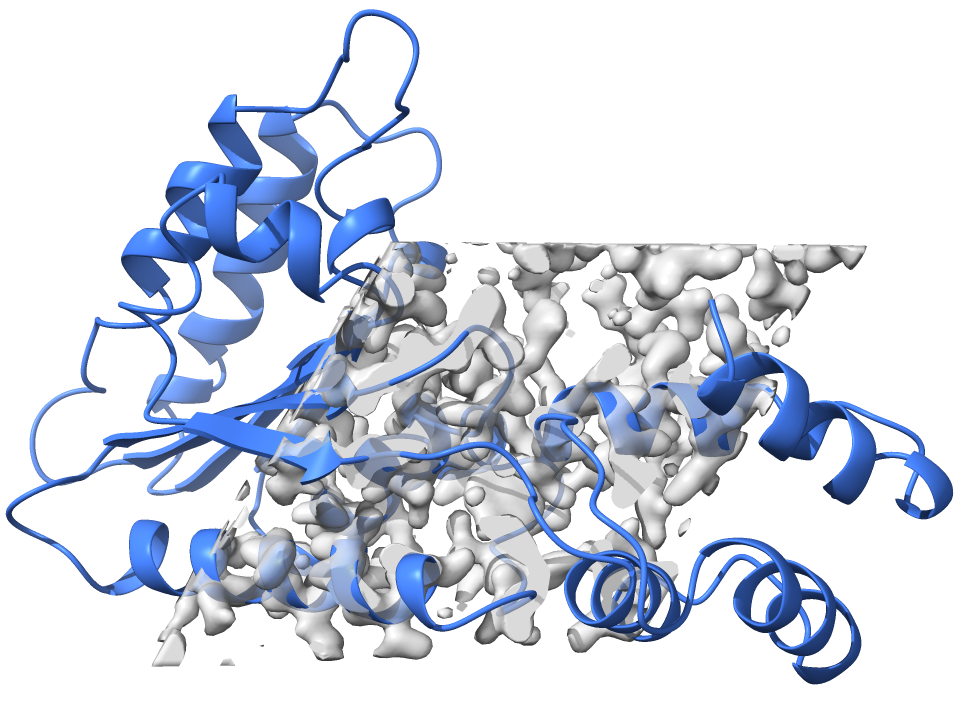
The model boxed_ligand_map.pdb corresponds to a protein model, the map boxed_ligand_map.ccp4 corresponds to a box of density covering part of the protein. The image below shows what it looks like in a molecular viewer:
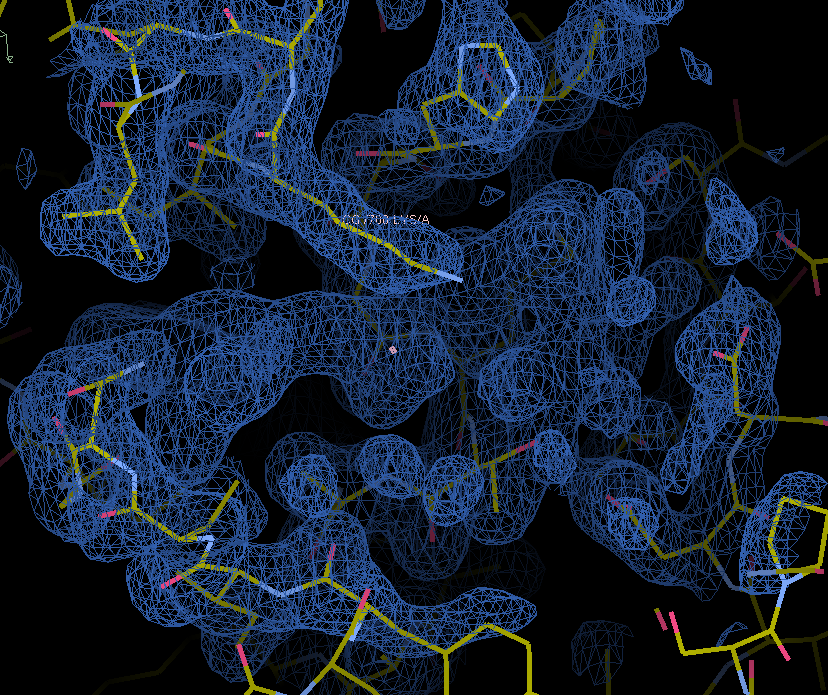
When we zoom into the density, we can see that the map has some unaccounted density for a ligand:
Let’s fit a ligand into this density using the fit_ligand model-building tool. Let’s use the map_model_manager mmm containing this map and model to do this.
Let’s get rid of any part of the model that is outside the part of the map that is present (this modifies the map_model_manager mmm permanently, so it’s a good thing we have saved a copy):
mmm.remove_model_outside_map(boundary=1.5) # remove model outside map
Now let’s get a model-building object:
build = mmm.model_building() # get a model-building object
And let’s fit a ligand (ATP) into the map:
fitted_ligand = build.fit_ligand(ligand_code = 'ATP') # fit the ligand
The first thing that happens is the fit_ligand tool generates a generic ATP molecule and its associated restraints. (If you wanted to, you could have supplied these directly with the keywords ligand_model and restraints_object, and you would have read in the ligand_model and restraints_object with the DataManager dm.)
The next thing that happens is the fit_ligand tool figures out where to place the ATP, and what bonds to rotate to fit the ATP into the density. Your fitted ligand is in fitted_ligand and you can write it out if you want with the DataManager dm:
dm.write_model_file(fitted_ligand, 'fitted_ligand.pdb') # Fitted ligand
If you didn’t save the fitted ligand when you ran the build.fit_ligand command, you can still get it:
result = build.get_best_result()   # get the best fitted ligand result object
fitted_ligand = result.model   # the fitted ligand as a model
You can also write out the working map and model (the model that was used to mask the map):
dm.write_model_file(build.model(), 'working_model.pdb')  # Working model
dm.write_real_map_file(build.map_manager(), 'working_map.ccp4')# Working map
Have a look at fitted_ligand.pdb, working_model.pdb, and 'working_map.ccp4 with Coot or Chimera. Note that this map is a part of an xray map and so the unit cell is not a rectangular box (it is hexagonal in this case).