Building a model into density
Learn how to build a model into some density and how to automatically extend the newly built chain.
Setting up example data
First, let's set up the example data (described in more detail here):
Get the files from the Phenix regression directory and change into the new folder:
phenix.setup_tutorial tutorial_name=model-building-scripting
cd model-building-scripting
Type phenix.python to start up Python with the Phenix environment all set up:
phenix.pythonSet up the high level objects, so we can start our task:
from iotbx.data_manager import DataManager    # Load in the DataManager
dm = DataManager()             # Initialize the DataManager and call it dm
dm.set_overwrite(True)         # Overwrite files with the same name
Building a model
Let’s build a model into some density in a map using the build model-building tool. We can read in a map file from the model-building regression directory (no model this time):
mmm = dm.get_map_model_manager( model_file = None,       # getting a map_model_manager
    map_files="short_model_box.ccp4")   # map file
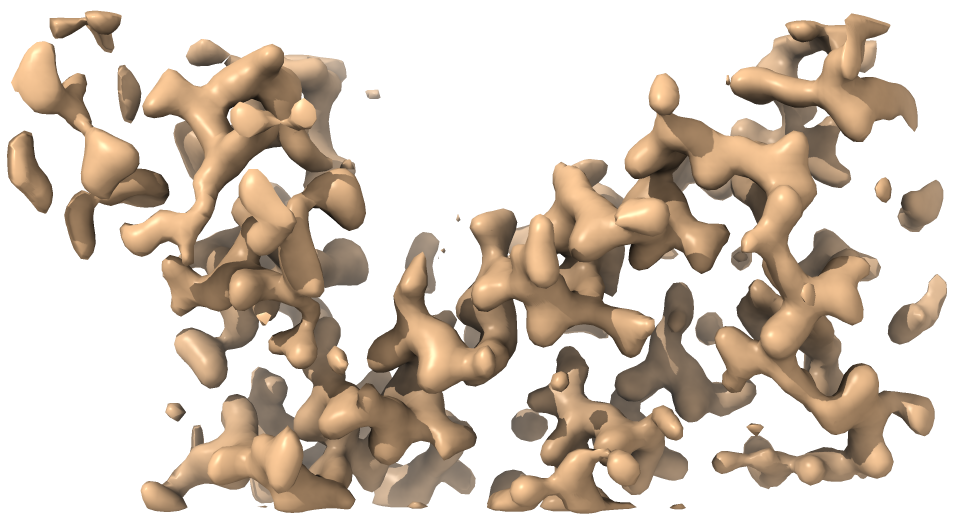
Below is an image of the map:

Let’s also tell the map_model_manager mmm about the resolution and experiment type (cryo_em or xray).
mmm.set_resolution(3.0)    # working (nominal) resolution of map
mmm.set_experiment_type('xray')   # define experiment type
Let’s get a model_building object:
build = mmm.model_building() # get a model-building object
...and set the number of processors to use (whatever number you have):
build.set_defaults(nproc = 4) # use 4 processors
And now let’s build into this map:
build.build() # build a model into current map
We can write out the resulting model and the map that was used:
dm.write_model_file(build.model(), 'built_model.pdb')  # Working model
dm.write_real_map_file(build.map_manager(), 'build_map.ccp4')# Working map
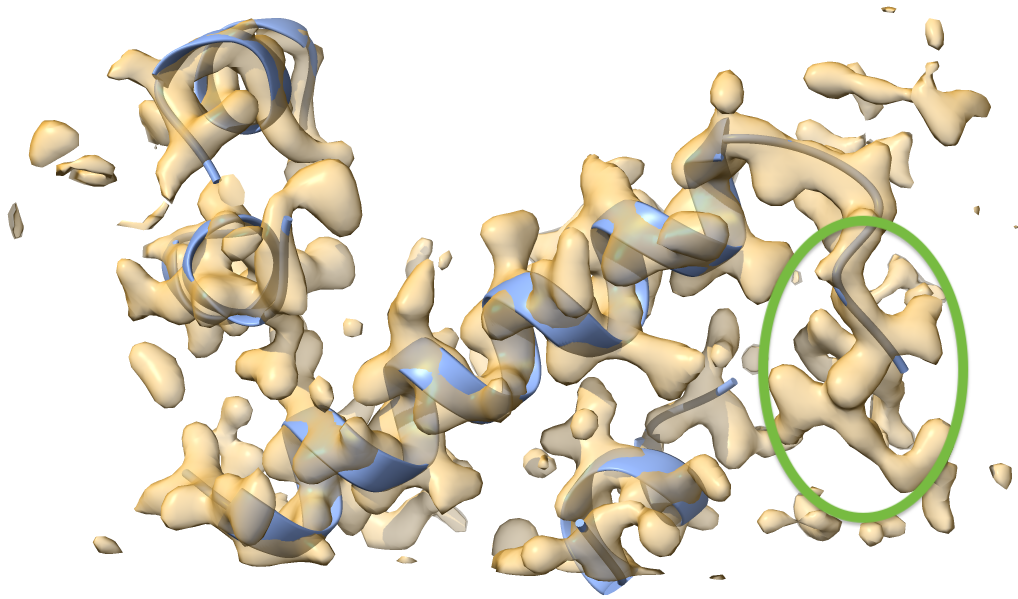
Have a look at this model and map in Coot or Chimera. You can see that three helices were built but there is still more to be built. In particular, the helix starting at residue 1 of chain U (green circle) appears to be suitable for extension in the N-terminal direction. Let’s do this next.

Extending a chain
Let’s extend one of the chains in the model we just built with the build tool. We can use the extend_reverse() method to create an extension in the N-terminal direction starting at residue 1 of chain U (it won’t insert it yet).
build.extend_reverse(chain_id = "U", first_resno_after_extend = 1) # extend
We can get just the extension if we want with the command:
result = build.get_best_result()   # get the best extension result object
insertion_model = result.model     # the extension as a model
Let’s insert the extension:
build.insert_extension() # insert best extension result object
We can refine the model with the inserted extension:
build.refine() # insert best extension result object
And write out the resulting model and the map that was used:
dm.write_model_file(build.model(), 'extended_model.pdb')  # Working model
dm.write_real_map_file(build.map_manager(), 'extended_map.ccp4')# Working map
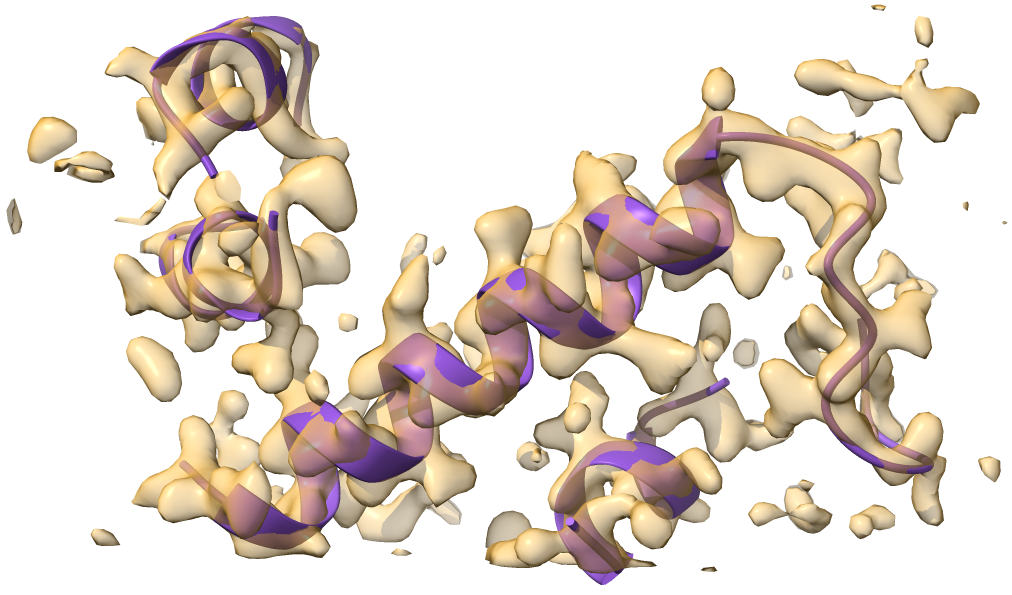
This results in more residues at the N-terminal end.

If some do not look very good you can remove them with a pair of commands like this:
new_model = build.model().apply_selection_string(    # apply a selection
   'not (chain U and resseq 1:1)'  )  # remove residue 1 from chain U
build.set_model(new_model)            # replace existing model with new_model
You can write out your new model:
dm.write_model_file(build.model(), 'extended_model_trimmed.pdb') # new model
If you want, you can get a map_model_manager back from the build model-building object with:
new_mmm = build.as_map_model_manager() # return a map_model_manager object
In this example we extended backwards from the N-terminus of the model. You can also extend forwards using the command build.extend.
Also in these examples we built a protein model. You can build and extend an RNA or DNA model as well. You usually specify the chain type before building with:
build.set_defaults(chain_type = 'RNA')
or a similar command for DNA or PROTEIN (the default is PROTEIN). The chain extensions just keep the same chain type as the part that is already present.